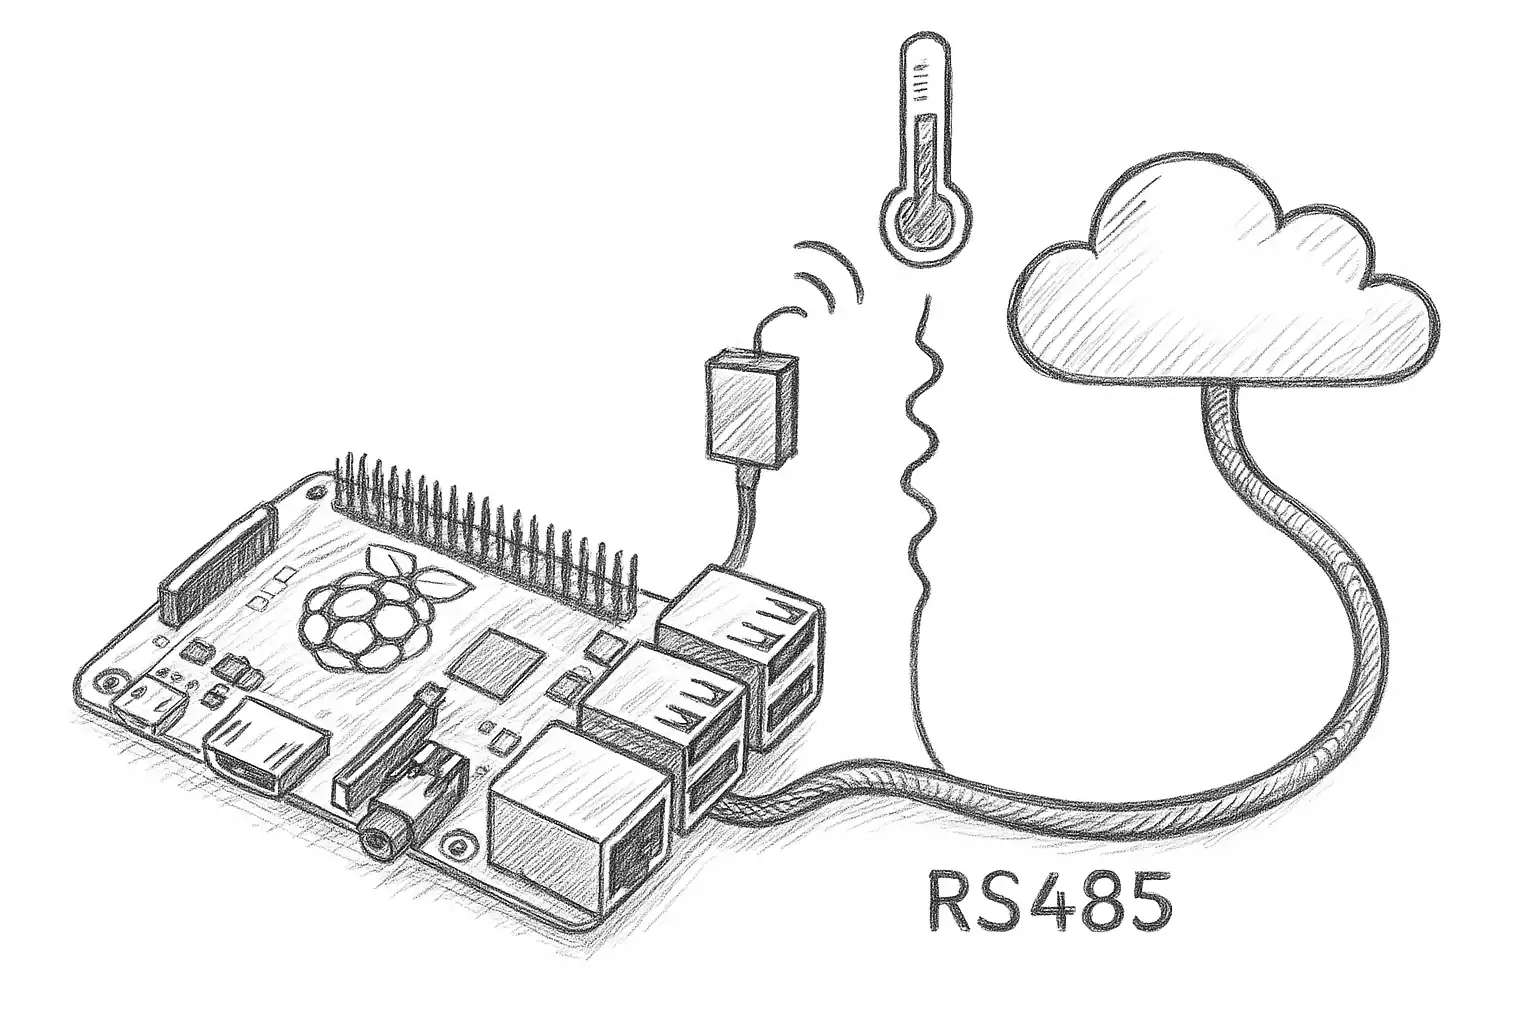
Connecting DS18B20 Temperature Sensors to RS485 Bus and Raspberry Pi
Table of Contents
- Project Overview
- Hardware Setup
- Connecting the Hardware
- Software Setup - The Fun Begins
- Installing My Python Script
- Testing the Connection
- Reading Temperatures Like a Boss
- Calibrating Your Sensors
- Automation and Monitoring
- Troubleshooting (When Shit Hits the Fan)
- Conclusion
- Additional Resources
Project Overview
I’m in the middle of migrating from my old home automation setup based on Raspberry Pi Automation HAT connected to temperature sensors via 1-wire bus to a more robust RS485 bus architecture. Why? Because I want to move my Raspberry Pi out of my electrical box to a rackmount server and maybe in the future move all computing to the cloud or at least a Kubernetes/K3s cluster.
Basically, 1-wire sucks for long distances and RS485 is way cooler.
So I bought some new DS18B20 sensors with RS485 interface (R4DCB08 module) from AliExpress and decided to document my journey with them.
Also, I created a Python script to make reading data from multiple DS18B20 sensors way easier than it should be: https://github.com/CalmWookie/R4DCB08-Python
Hardware Setup
Here’s what you need to get this party started:
- Raspberry Pi: Any model with USB ports. I actually used my Mac for most of the development because why not.
- RS485 to USB Converter: This magical device lets you connect RS485 to USB. Get a decent one, the cheap ones are… cheap.
- DS18B20 Sensors: I used waterproof ones because water and electronics don’t mix well (shocking, I know).
- Wiring: Twisted pair cables work great. Cat5 cable is perfect and you probably have some lying around.
- 120Ohm Resistor: For terminating the RS485 bus. This is your first troubleshooting step when things don’t work.
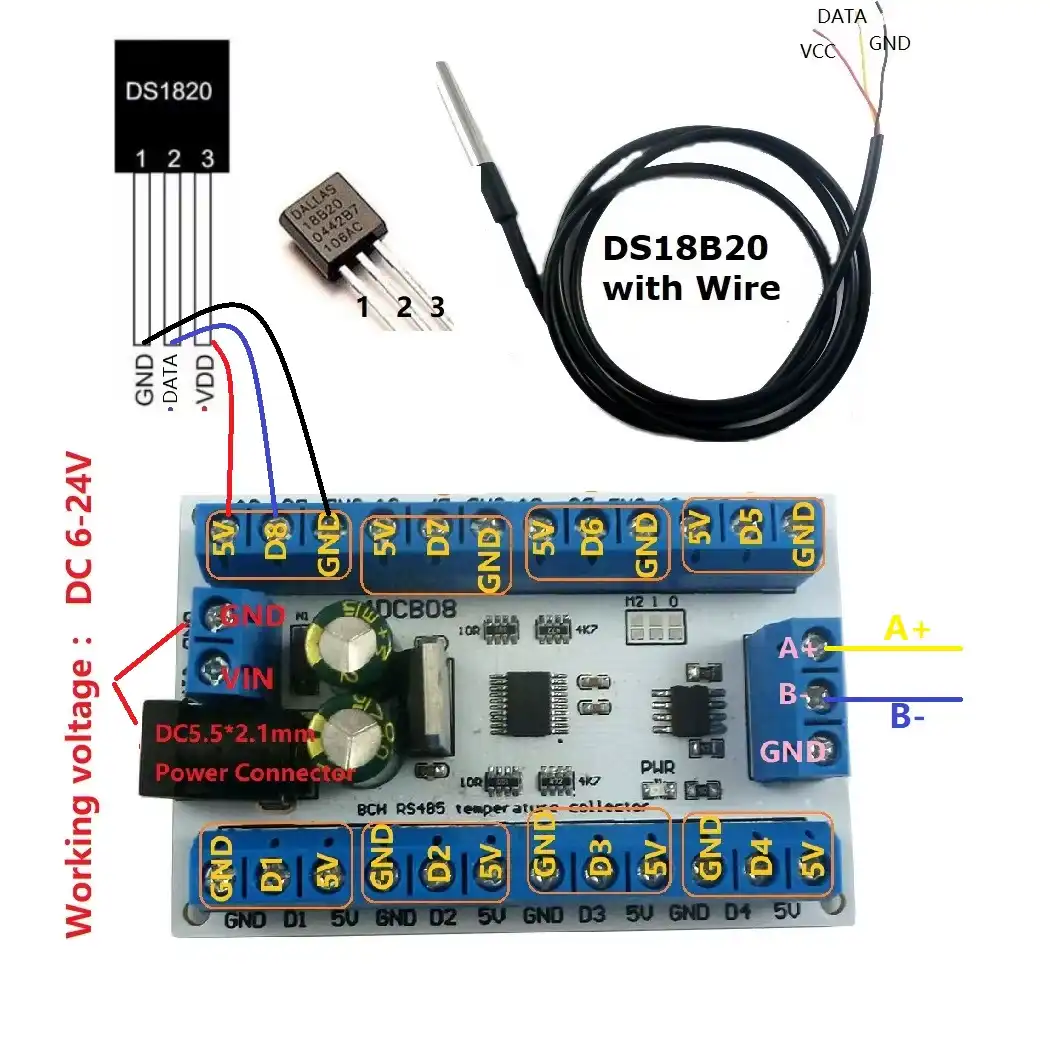
- R4DCB08 Module: The star of the show - RS485 to 1-wire adapter supporting up to 8 DS18B20 sensors.
Connecting the Hardware
This part is pretty straightforward, but let me break it down for you:
- USB Connection: Plug your RS485 to USB converter into your Raspberry Pi (or whatever computer you’re using).
- RS485 Wiring: Connect the A and B lines from your converter to the corresponding A and B terminals on the R4DCB08. Don’t mix these up unless you enjoy debugging.
- DS18B20 Sensors: Connect your sensors to the R4DCB08:
- VCC (RED wire) goes to VCC terminal
- GND (BLACK wire) goes to GND terminal
- DQ (YELLOW wire) goes to one of channels 1-8
- Termination: If your cable run is longer than a few meters, slap a 120Ohm resistor between A and B lines at both ends. Your future self will thank you.
Software Setup - The Fun Begins
Time to make this thing actually work! First, let’s get your system ready:
# Update your system because why not
sudo apt update && sudo apt upgrade -y

# Install Python stuff we'll need
sudo apt install python3-pip python3-venv git -y
Installing My Python Script
Instead of wrestling with raw Modbus commands like some masochist, let’s use my pre-built script:
# Clone the repo
git clone https://github.com/CalmWookie/R4DCB08-Python.git
cd R4DCB08-Python

# Create a virtual environment (because Python dependency hell is real)
python3 -m venv .venv
source .venv/bin/activate  # Linux/macOS
# or .venv\Scripts\activate for Windows folks

# Install the requirements
pip install -r requirement.txt
Testing the Connection
Let’s see if this thing actually works! First, find your USB device:
# Linux/macOS - usually shows up as ttyUSB0 or similar
ls /dev/ttyUSB*
# or sometimes (for Pi Zero with USB OTG)
ls /dev/ttyACM*

# Windows users, check Device Manager for COM ports
Now test the basic connection:
# Read all temperatures (replace /dev/ttyUSB0 with your actual port)
python r4dcb08_cli.py rtu --port /dev/ttyUSB0 --address 1 read-all
If you see temperature readings, congratulations! You’re not completely hopeless. If you see errors, keep reading the troubleshooting section.
Reading Temperatures Like a Boss
Here’s where the magic happens. My script makes it stupidly easy to read temperatures:
Read All Sensors at Once
python r4dcb08_cli.py rtu --port /dev/ttyUSB0 --address 1 read-allOutput looks like this:
R4DCB08 Temperature Readings:
-----------------------------------
Channel 0: 22.5°C
Channel 1: 23.1°C
Channel 2: No sensor
Channel 3: 21.8°C
Channel 4: No sensor
Channel 5: No sensor
Channel 6: No sensor
Channel 7: No sensor
Read Just One Sensor
# Read channel 0 (first sensor)
python r4dcb08_cli.py rtu --port /dev/ttyUSB0 read-channel 0
Different Device Address?
If your R4DCB08 has a different Modbus address (default is 1):
python r4dcb08_cli.py rtu --port /dev/ttyUSB0 --address 5 read-allTCP Instead of Serial?
Some RS485 converters support Ethernet. For those fancy setups:
python r4dcb08_cli.py tcp --host 192.168.1.100 read-allCalibrating Your Sensors
Because Chinese sensors are… optimistic with their accuracy:
Check Current Calibrations
python r4dcb08_cli.py rtu --port /dev/ttyUSB0 read-correctionsSet a Correction Value
If your sensor is reading 2.1°C too high:
python r4dcb08_cli.py rtu --port /dev/ttyUSB0 set-correction 0 -2.1Or if it’s reading too low, add a positive correction:
python r4dcb08_cli.py rtu --port /dev/ttyUSB0 set-correction 1 1.5Troubleshooting (When Shit Hits the Fan)
“No Sensor” Readings
- Check your DS18B20 connections
- Verify power to the sensors (should see ~5V between VCC and GND)
- Try connecting just one sensor first
- Some sensors are just dead on arrival (AliExpress special)
Weird Temperature Values
- Check your calibration corrections with
read-corrections - Could be electromagnetic interference
- Sensors might need time to stabilize
Common Error Messages and What They Actually Mean
- “Failed to connect”: Your port path is wrong or permissions suck
- “Modbus error”: Communication issue, check address and baud rate
- “Channel must be 0-7”: You can’t count properly
- “Correction must be between -327.6 and +327.6”: Your correction value is insane
Conclusion
And there you have it! You now have a proper RS485-based temperature monitoring system that doesn’t suck. The R4DCB08 is actually a pretty decent little module, and my Python script makes it dead simple to use.
This setup is way more reliable than 1-wire for longer distances, and you can daisy-chain multiple R4DCB08 modules if you need more than 8 sensors. Just give each one a different Modbus address.
Now go forth and monitor ALL THE TEMPERATURES! Your ADHD brain will thank you for having yet another system to obsess over.
Next up: I’m planning to integrate this with Home Assistant and maybe build a web dashboard. Because why stop at “good enough” when you can over-engineer everything?