
Project update: Putting GC-01 and Raspberry Pi on the roof of my house
Table of Contents
- Project Overview
- Adding PoE Ethernet/USB HUB Hat to Raspberry Pi Zero
- Powering Raspberry Pi by PoE Switch
- Disabling Alarms in GC-01 Geiger Counter
- Mounting Raspberry Pi with GC-01 Geiger Counter on Roof
- Monitoring Logs from Raspberry Pi
- Checking Results on Monitoring Services
- Conclusion
- Additional Resources
Project Overview
Following up on my previous article about setting up the GC-01 Geiger counter with Raspberry Pi, I decided to take the project to the next level by creating a permanent outdoor installation. This project update covers the practical aspects of moving from a desktop prototype to a weatherproof, roof-mounted radiation monitoring station.
The main goals of this upgrade were:
- Permanent power solution using PoE, because my roof isn’t near a power outlet and I already have PoE infrastructure for my home network
- Weatherproof installation suitable for year-round outdoor operation
- Remote monitoring capabilities because increased radiation would be hard to notice from inside a building
Adding PoE Ethernet/USB HUB Hat to Raspberry Pi Zero
The first major upgrade was adding Power over Ethernet capability to eliminate the need for a separate power supply on the roof.
Required Components
- Raspberry Pi Zero or any other Pi model
- PoE Ethernet/USB HUB Hat compatible with your Pi model (Mine was Waveshare 19635 PoE Ethernet / USB HUB HAT)
- Ethernet cable (basically any cable will do, don’t bother about category if it is at least Cat5)
- PoE injector or PoE switch
- Phillips screwdriver
Hat Installation
The installation process is pretty straightforward - you just put the Raspberry Pi Zero on top of the PoE HAT and secure it with screws:
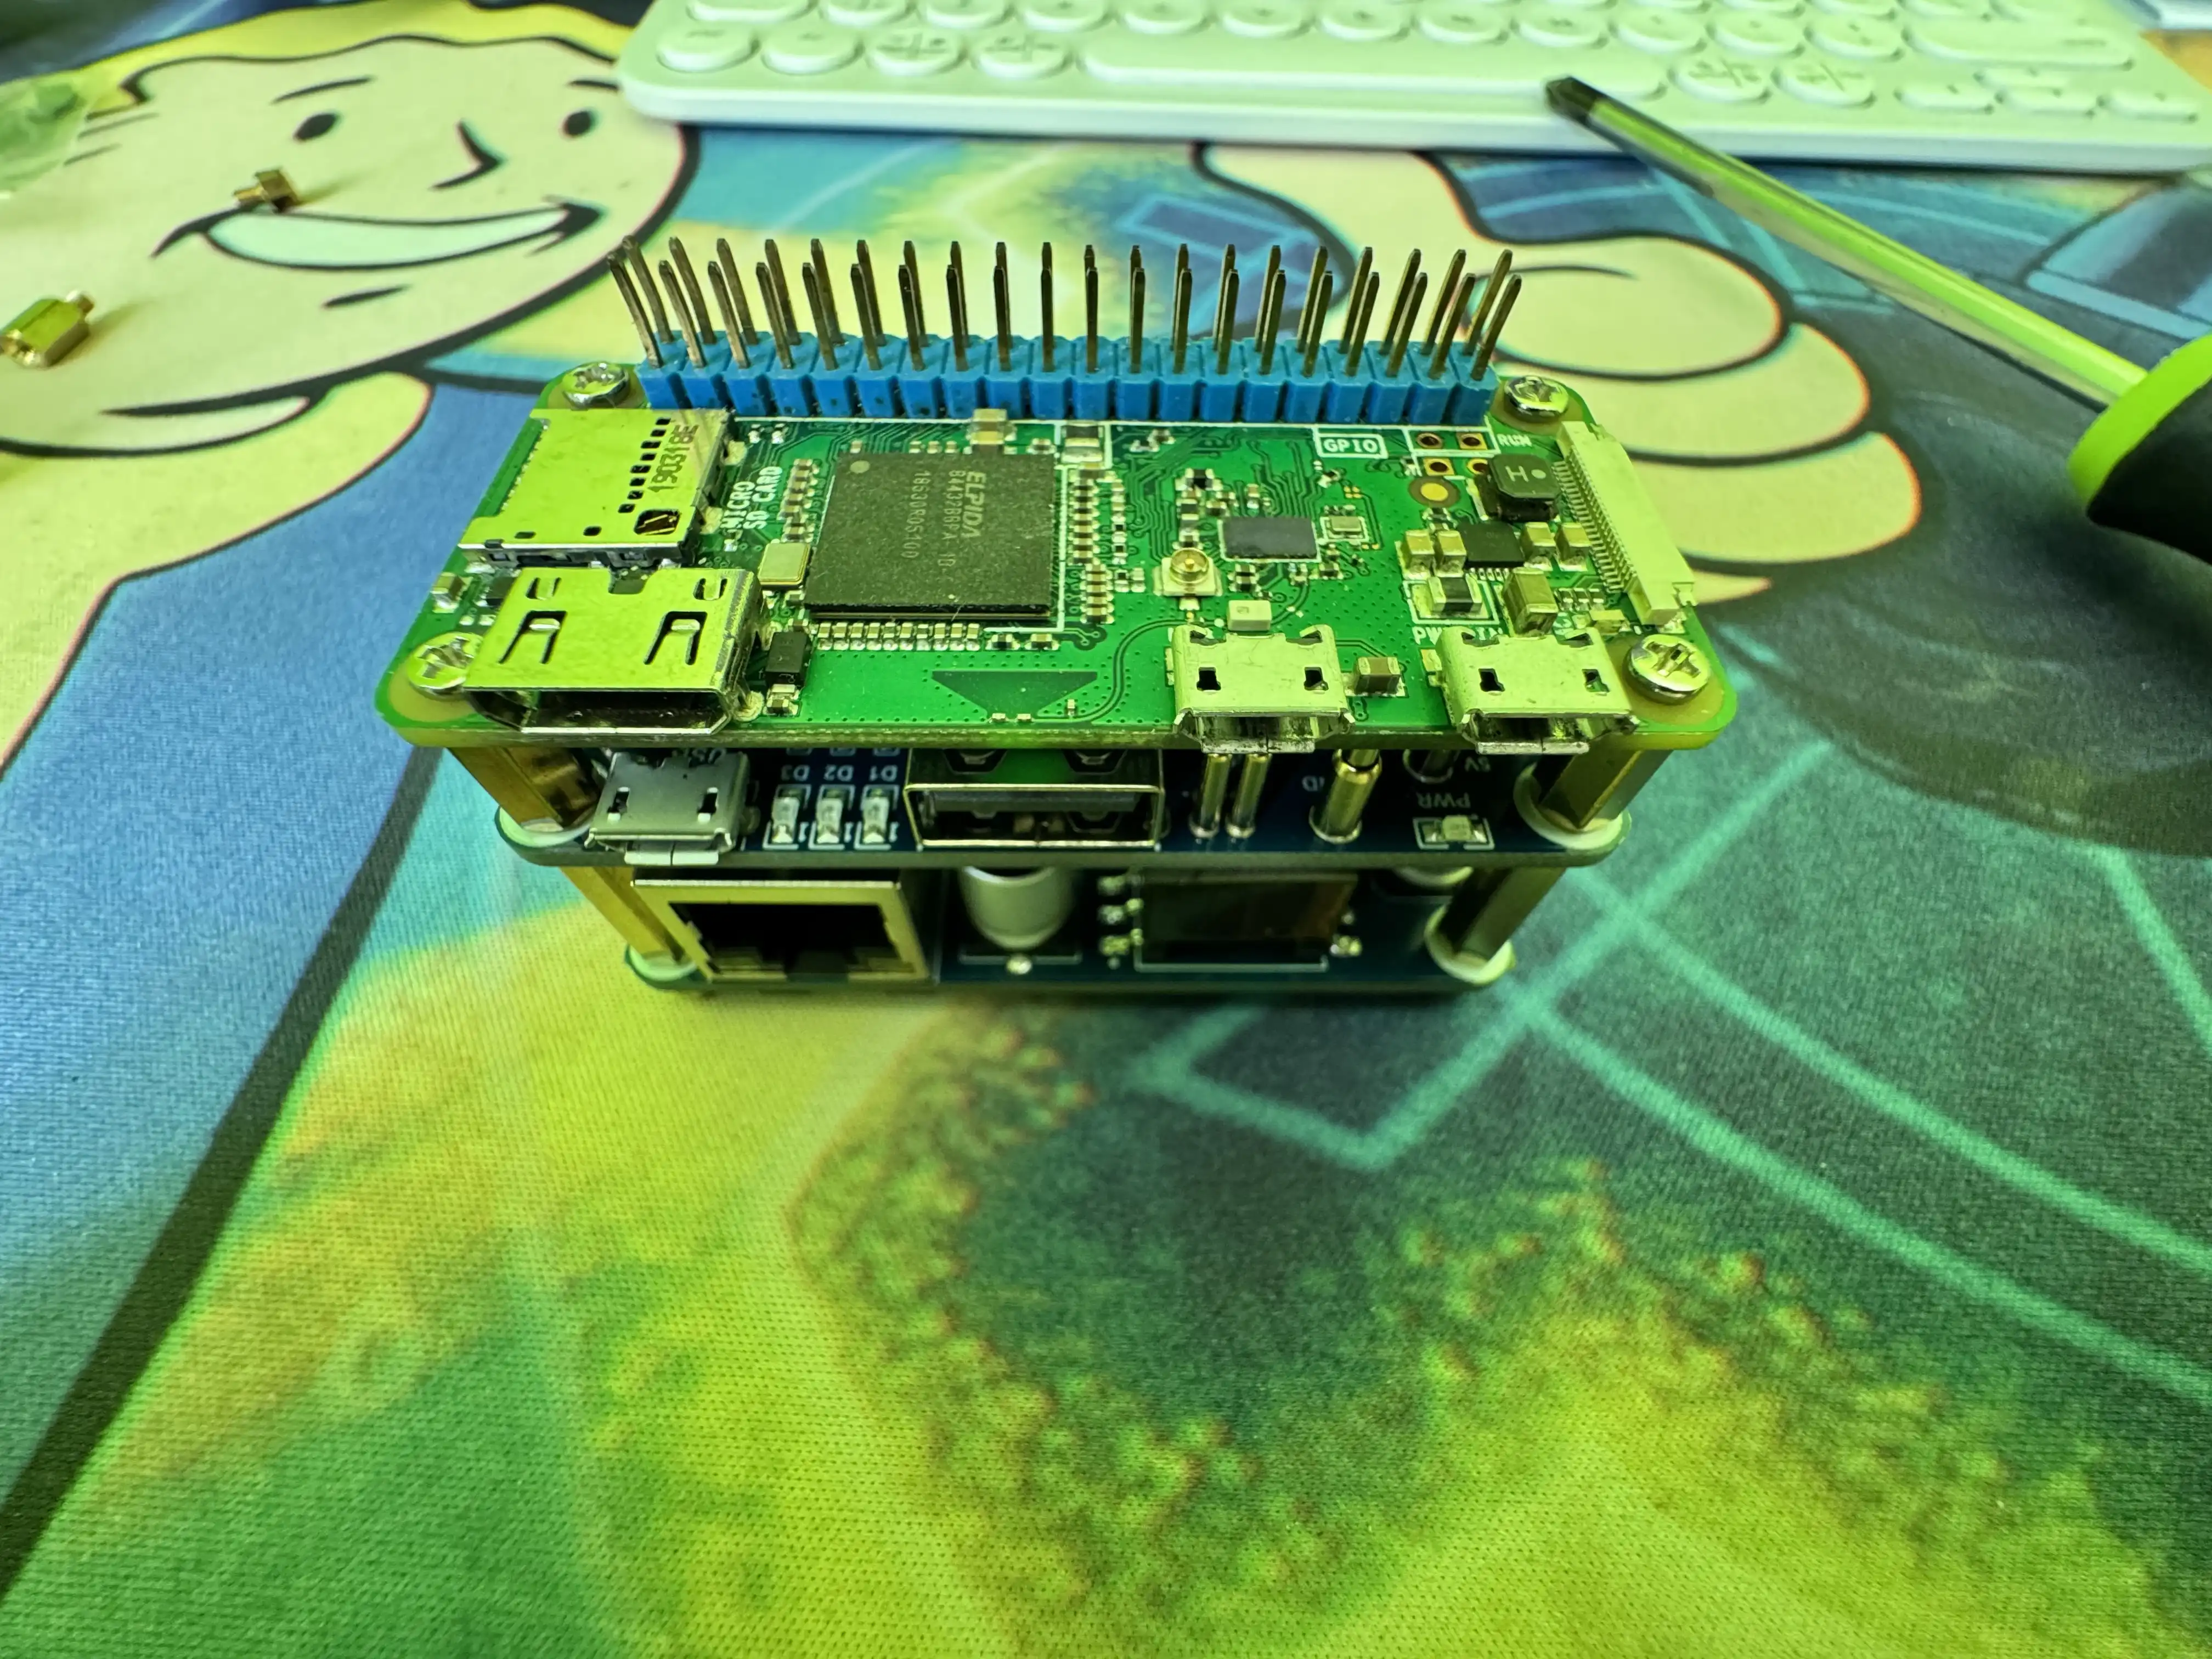
The PoE HAT provides both network connectivity and power through a single cable, which makes the rooftop installation way simpler. Plus, we get USB ports on the HAT to connect the GC-01 Geiger counter.
Powering Raspberry Pi by PoE Switch
PoE Configuration
I used a PoE+ switch to provide the necessary power (the Pi Zero with PoE Hat requires about 5-7 watts):
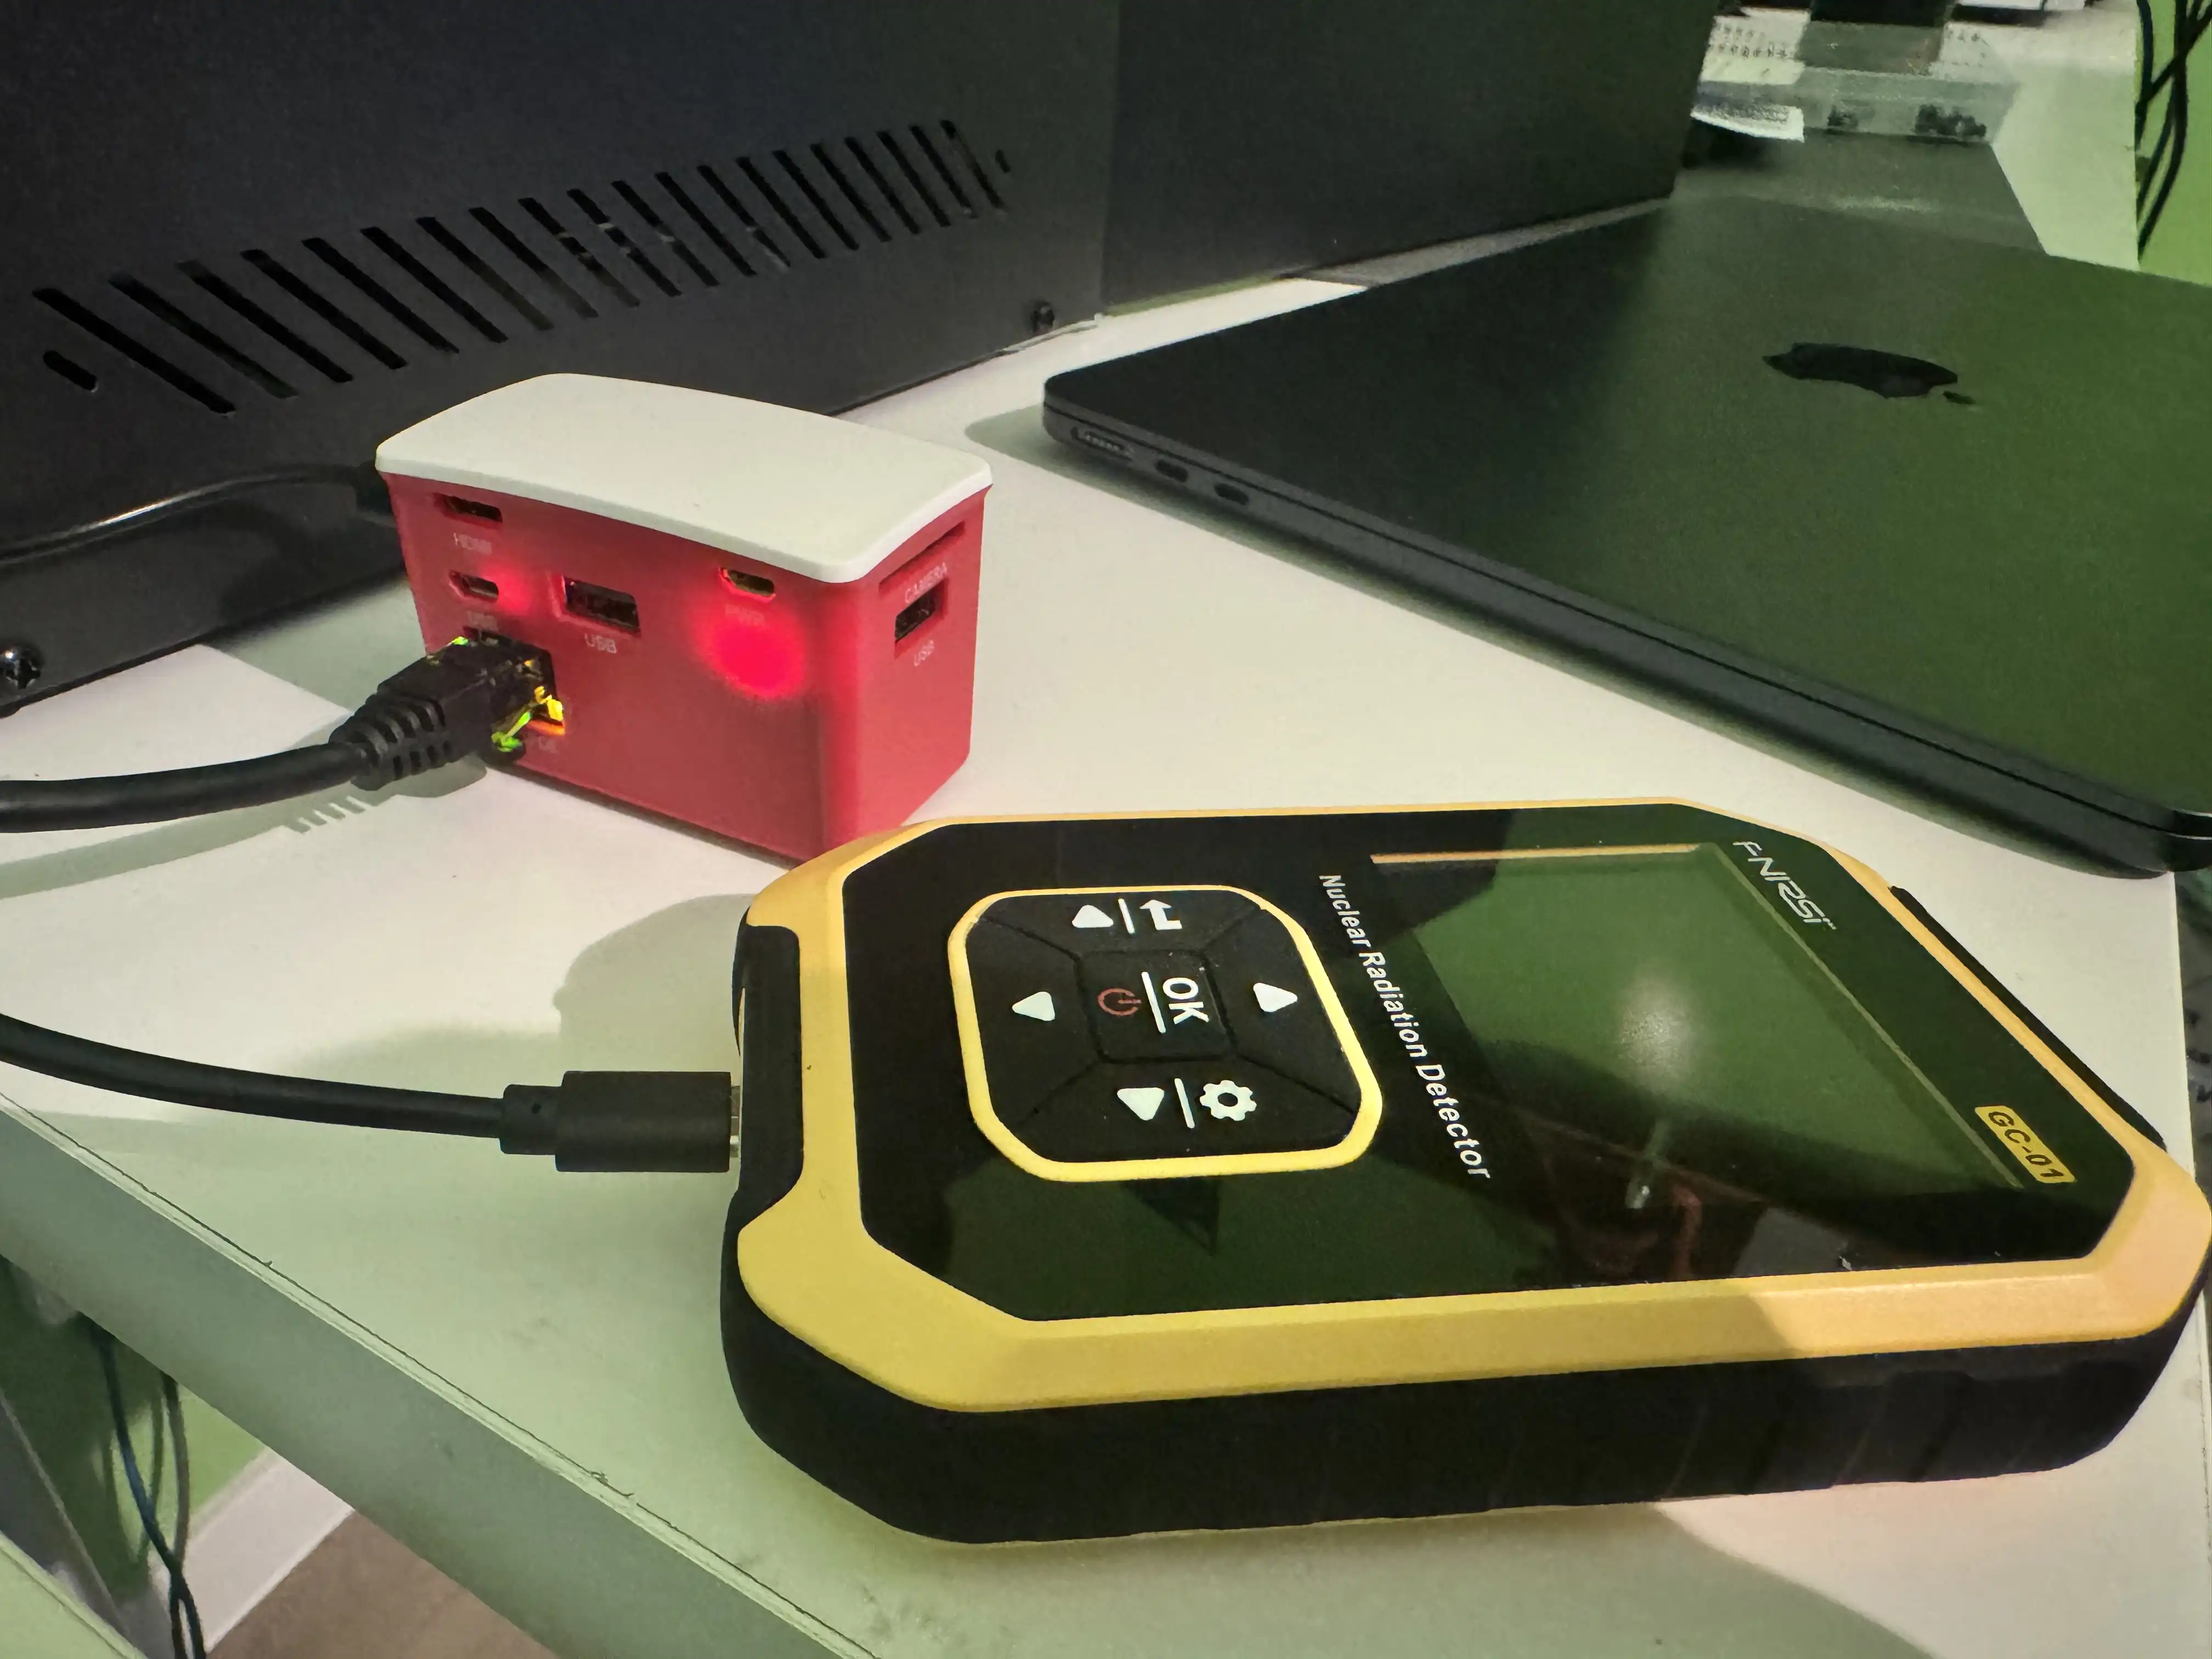
The system drew about 0.47A at 48V PoE, well within the capabilities of most PoE+ equipment. But my GC-01 was fully charged, so the current draw was lower than usual.
Disabling Alarms in GC-01 Geiger Counter
Why Disable Alarms for Outdoor Installation
For an unattended outdoor installation, audio and visual alarms aren’t needed and would just annoy the neighbors. So to disable sounds: go to Settings → Alert and set all alerts to OFF. To mute other sounds, hold the Settings/Right button for 3 seconds to toggle sound on/off.
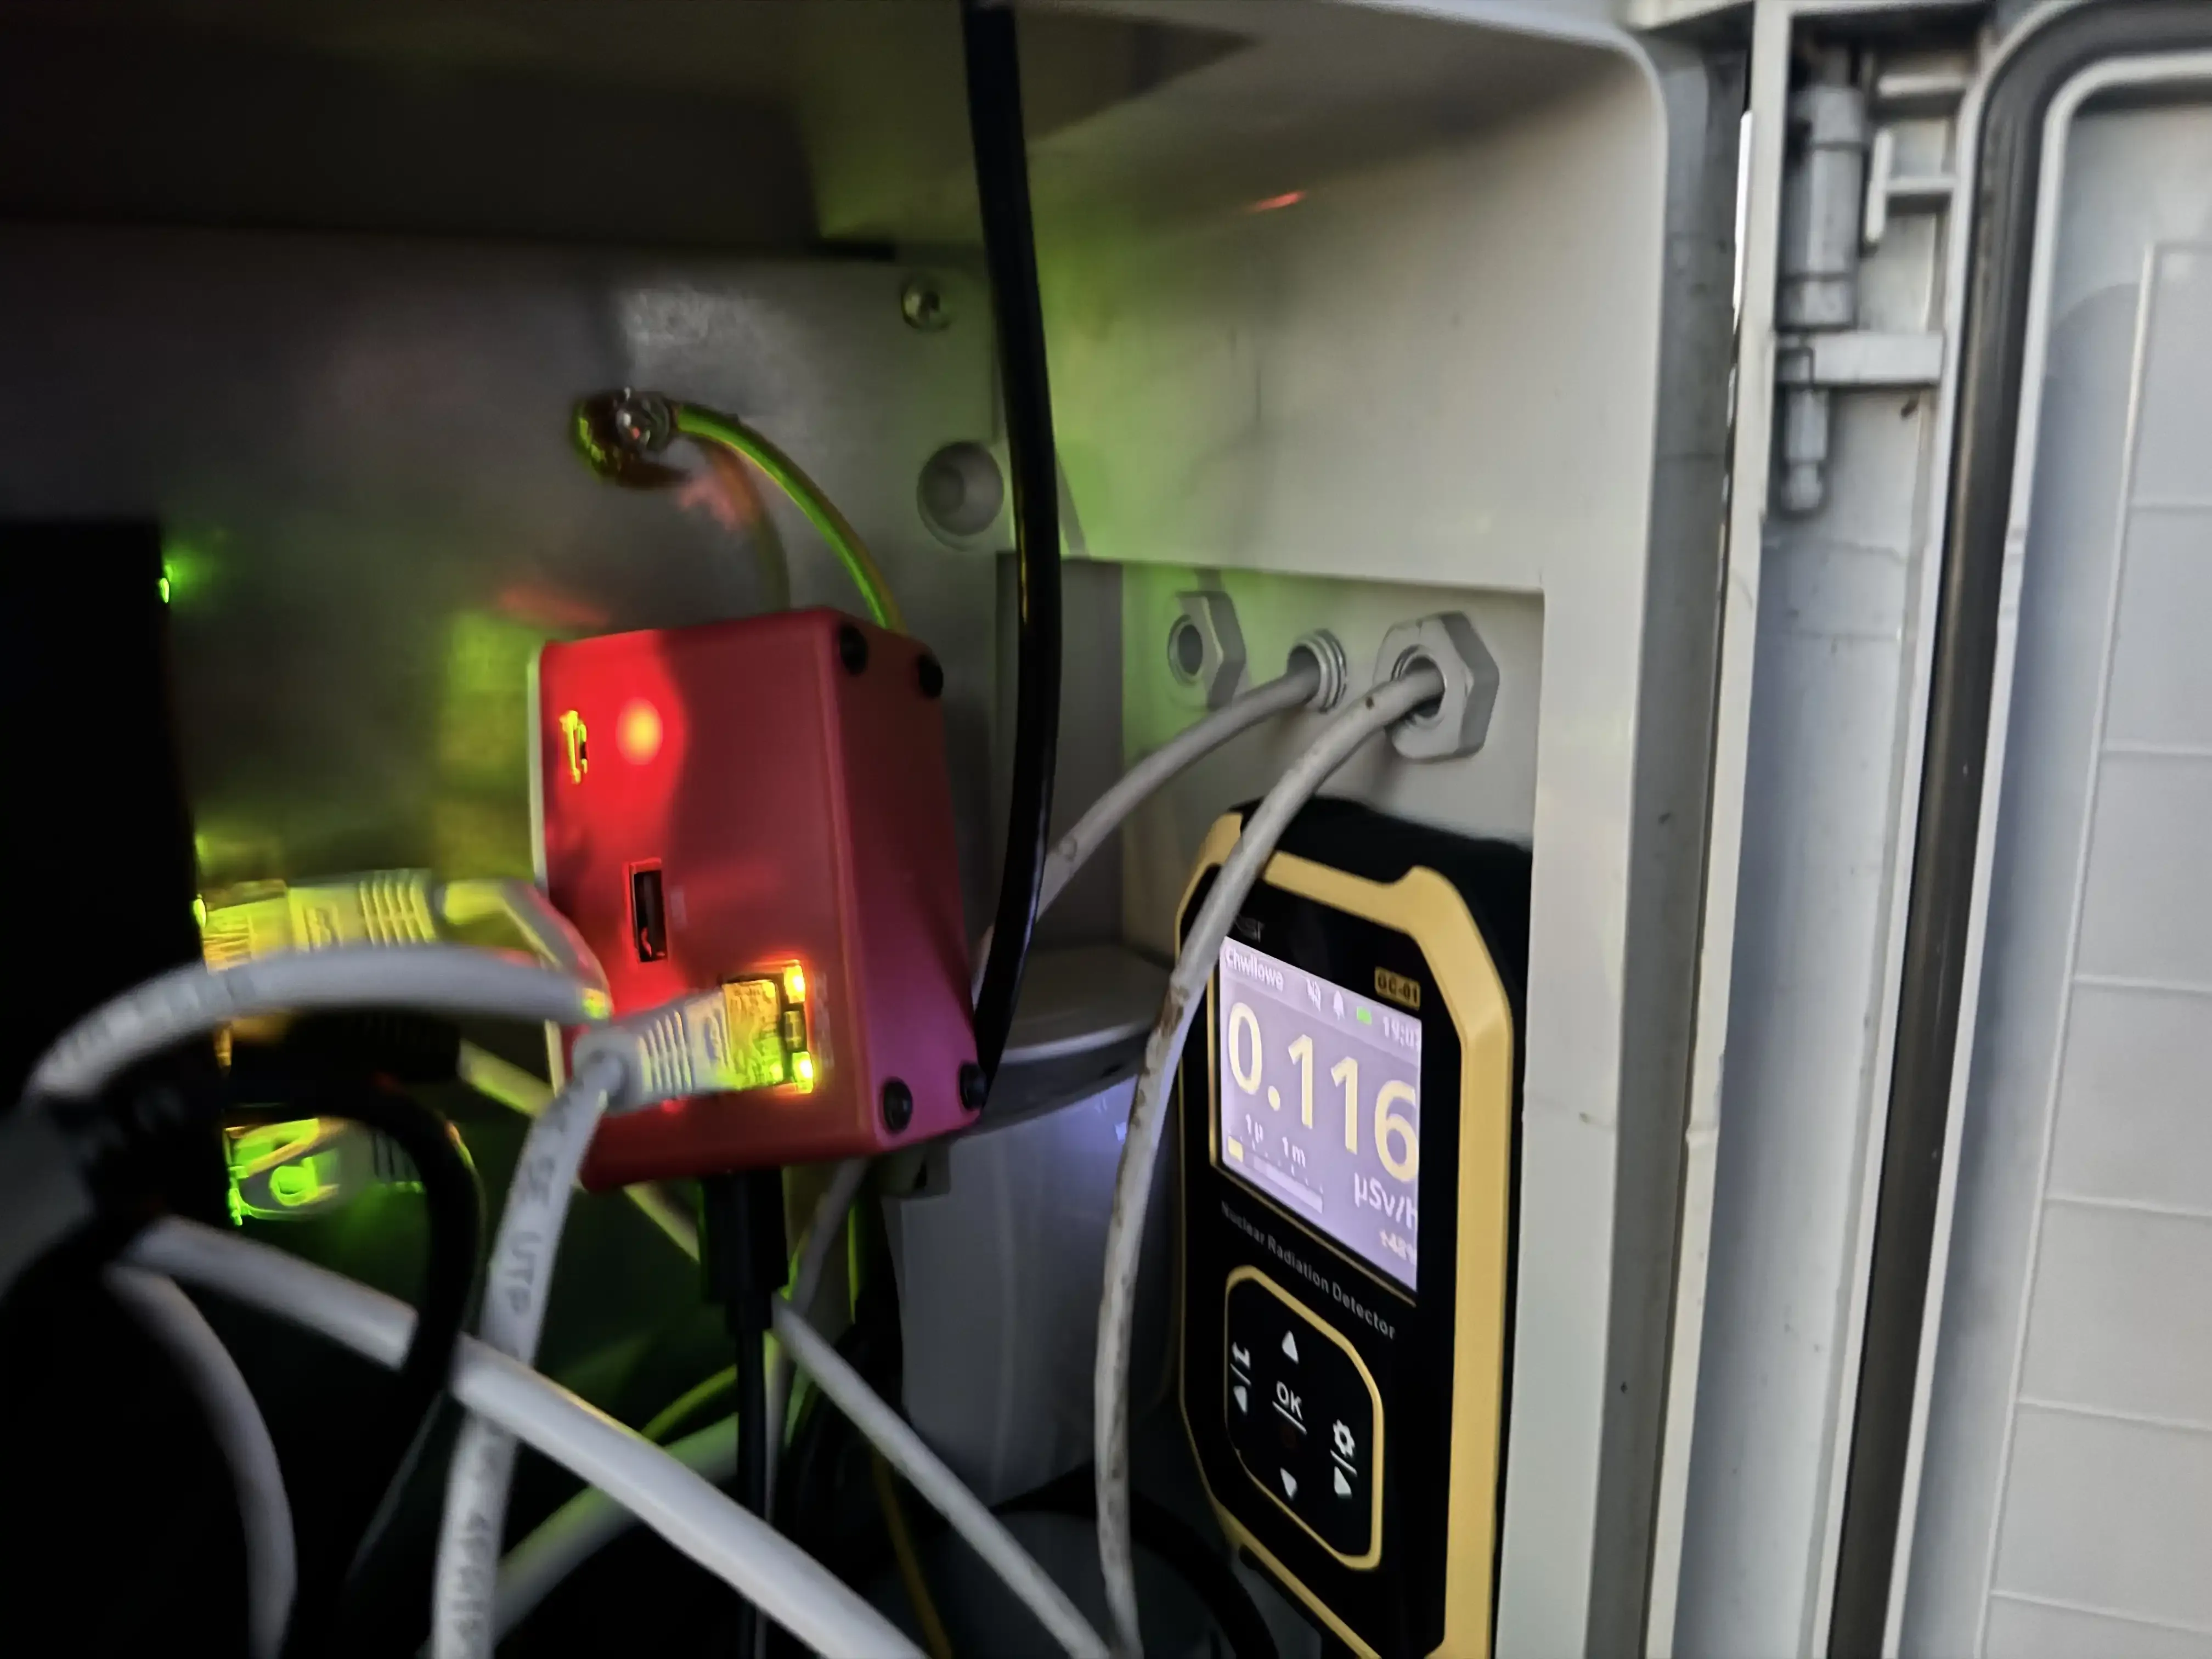
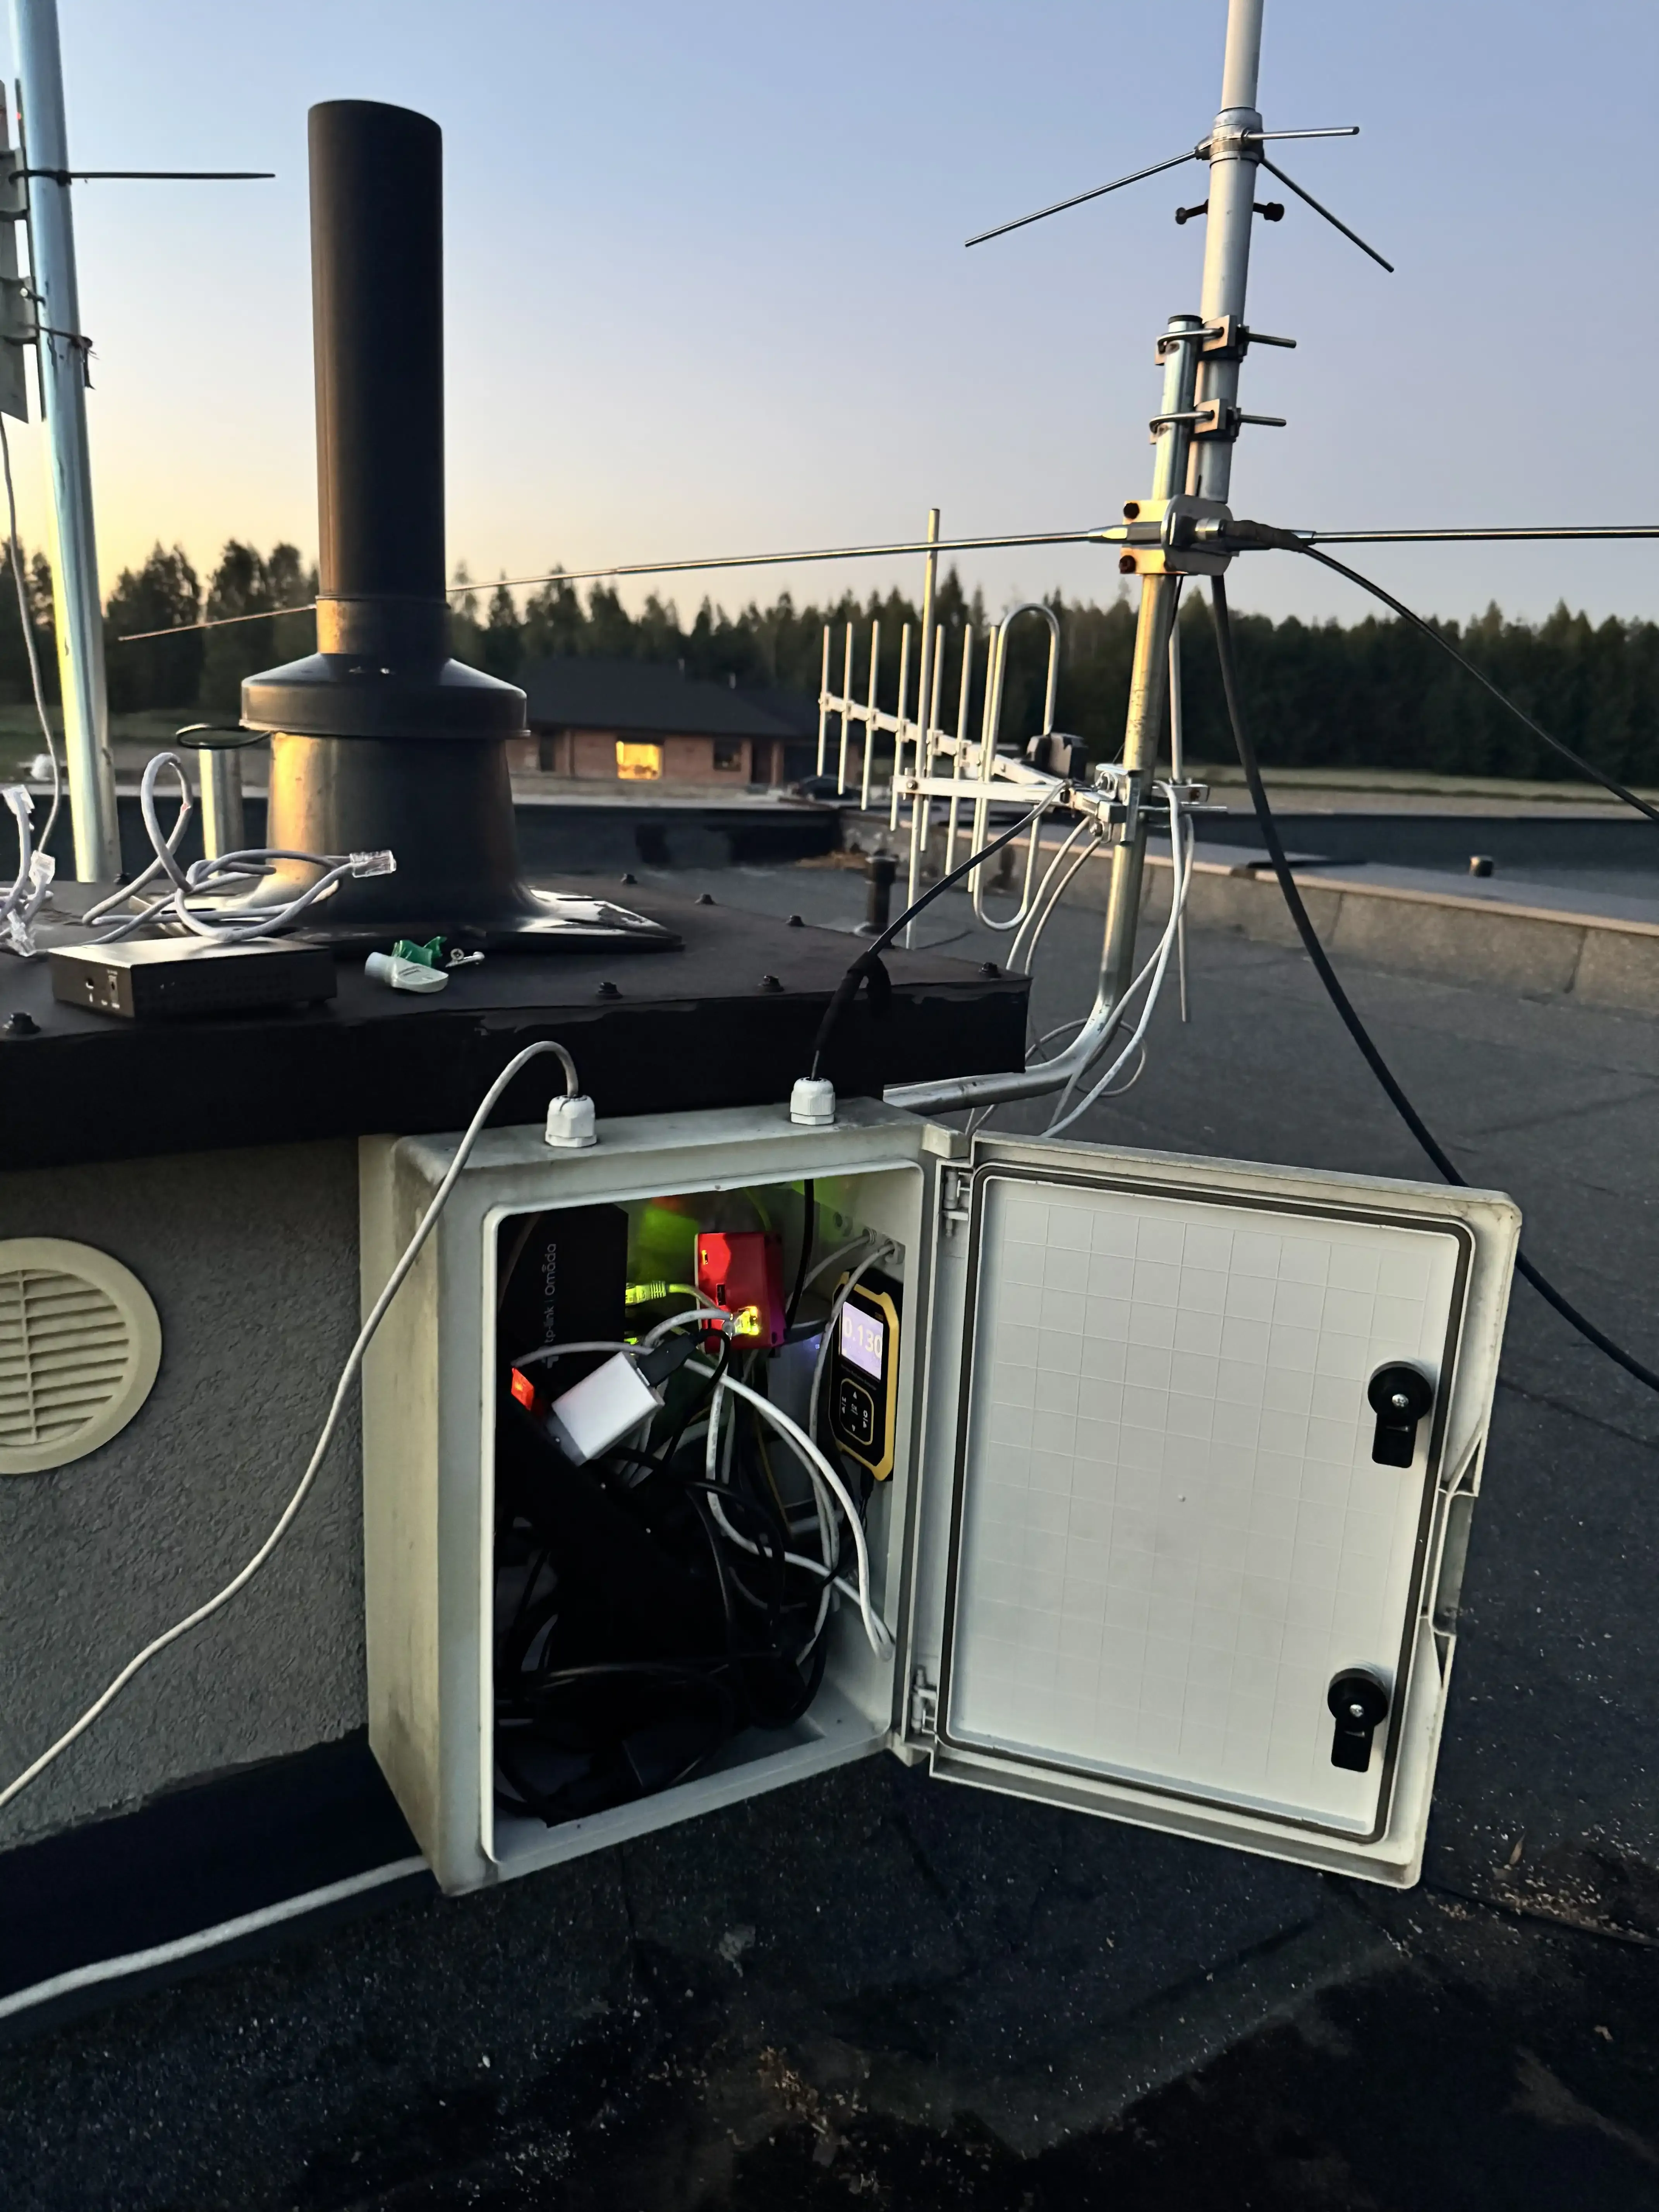
Mounting Raspberry Pi with GC-01 Geiger Counter on Roof
Weatherproofing Considerations
The outdoor installation required careful weatherproofing:
Enclosure Selection:
- IP65 rated weatherproof box
- Cable glands for Ethernet entry
Component Protection:
- Secure mounting for both Pi and GC-01
My roof already has an adequate weatherproof box I use for my meshtastic node, so I just used that one.
Monitoring Logs from Raspberry Pi
Remote Access Setup
After installation, I set up remote SSH access to check if the system was running properly:
# SSH into the roof-mounted Pi
ssh pi@[ROOF_PI_IP_ADDRESS]

# Check system status
systemctl status radpro-monitor.service
Log Monitoring Commands
As mentioned in the previous post, you can check logs using journalctl. Here are some additional commands you can use for monitoring the outdoor installation:
# Real-time log monitoring
sudo journalctl -u radpro-monitor.service -f

# Check for USB connection issues
dmesg | grep tty

# Monitor system health
htop
vcgencmd measure_temp
df -h
Output from journalctl:
![[Photo Placeholder: Terminal screenshot showing monitoring commands]](/images/RPIGC_Logs_From_Monitoring.webp)
You can see error messages related to USB disconnection because I disconnected the GC-01 to show you what it looks like.
Sep 24 18:03:16 gclogger python[796]: 2025-09-24T18:03:16.038337 error: [Errno 2] could not open port /dev/ttyACM0: [Errno 2] No such file or directory: '/dev/ttyACM0'The remote monitoring capability lets you troubleshoot issues without having to climb back onto the roof, which is pretty convenient.
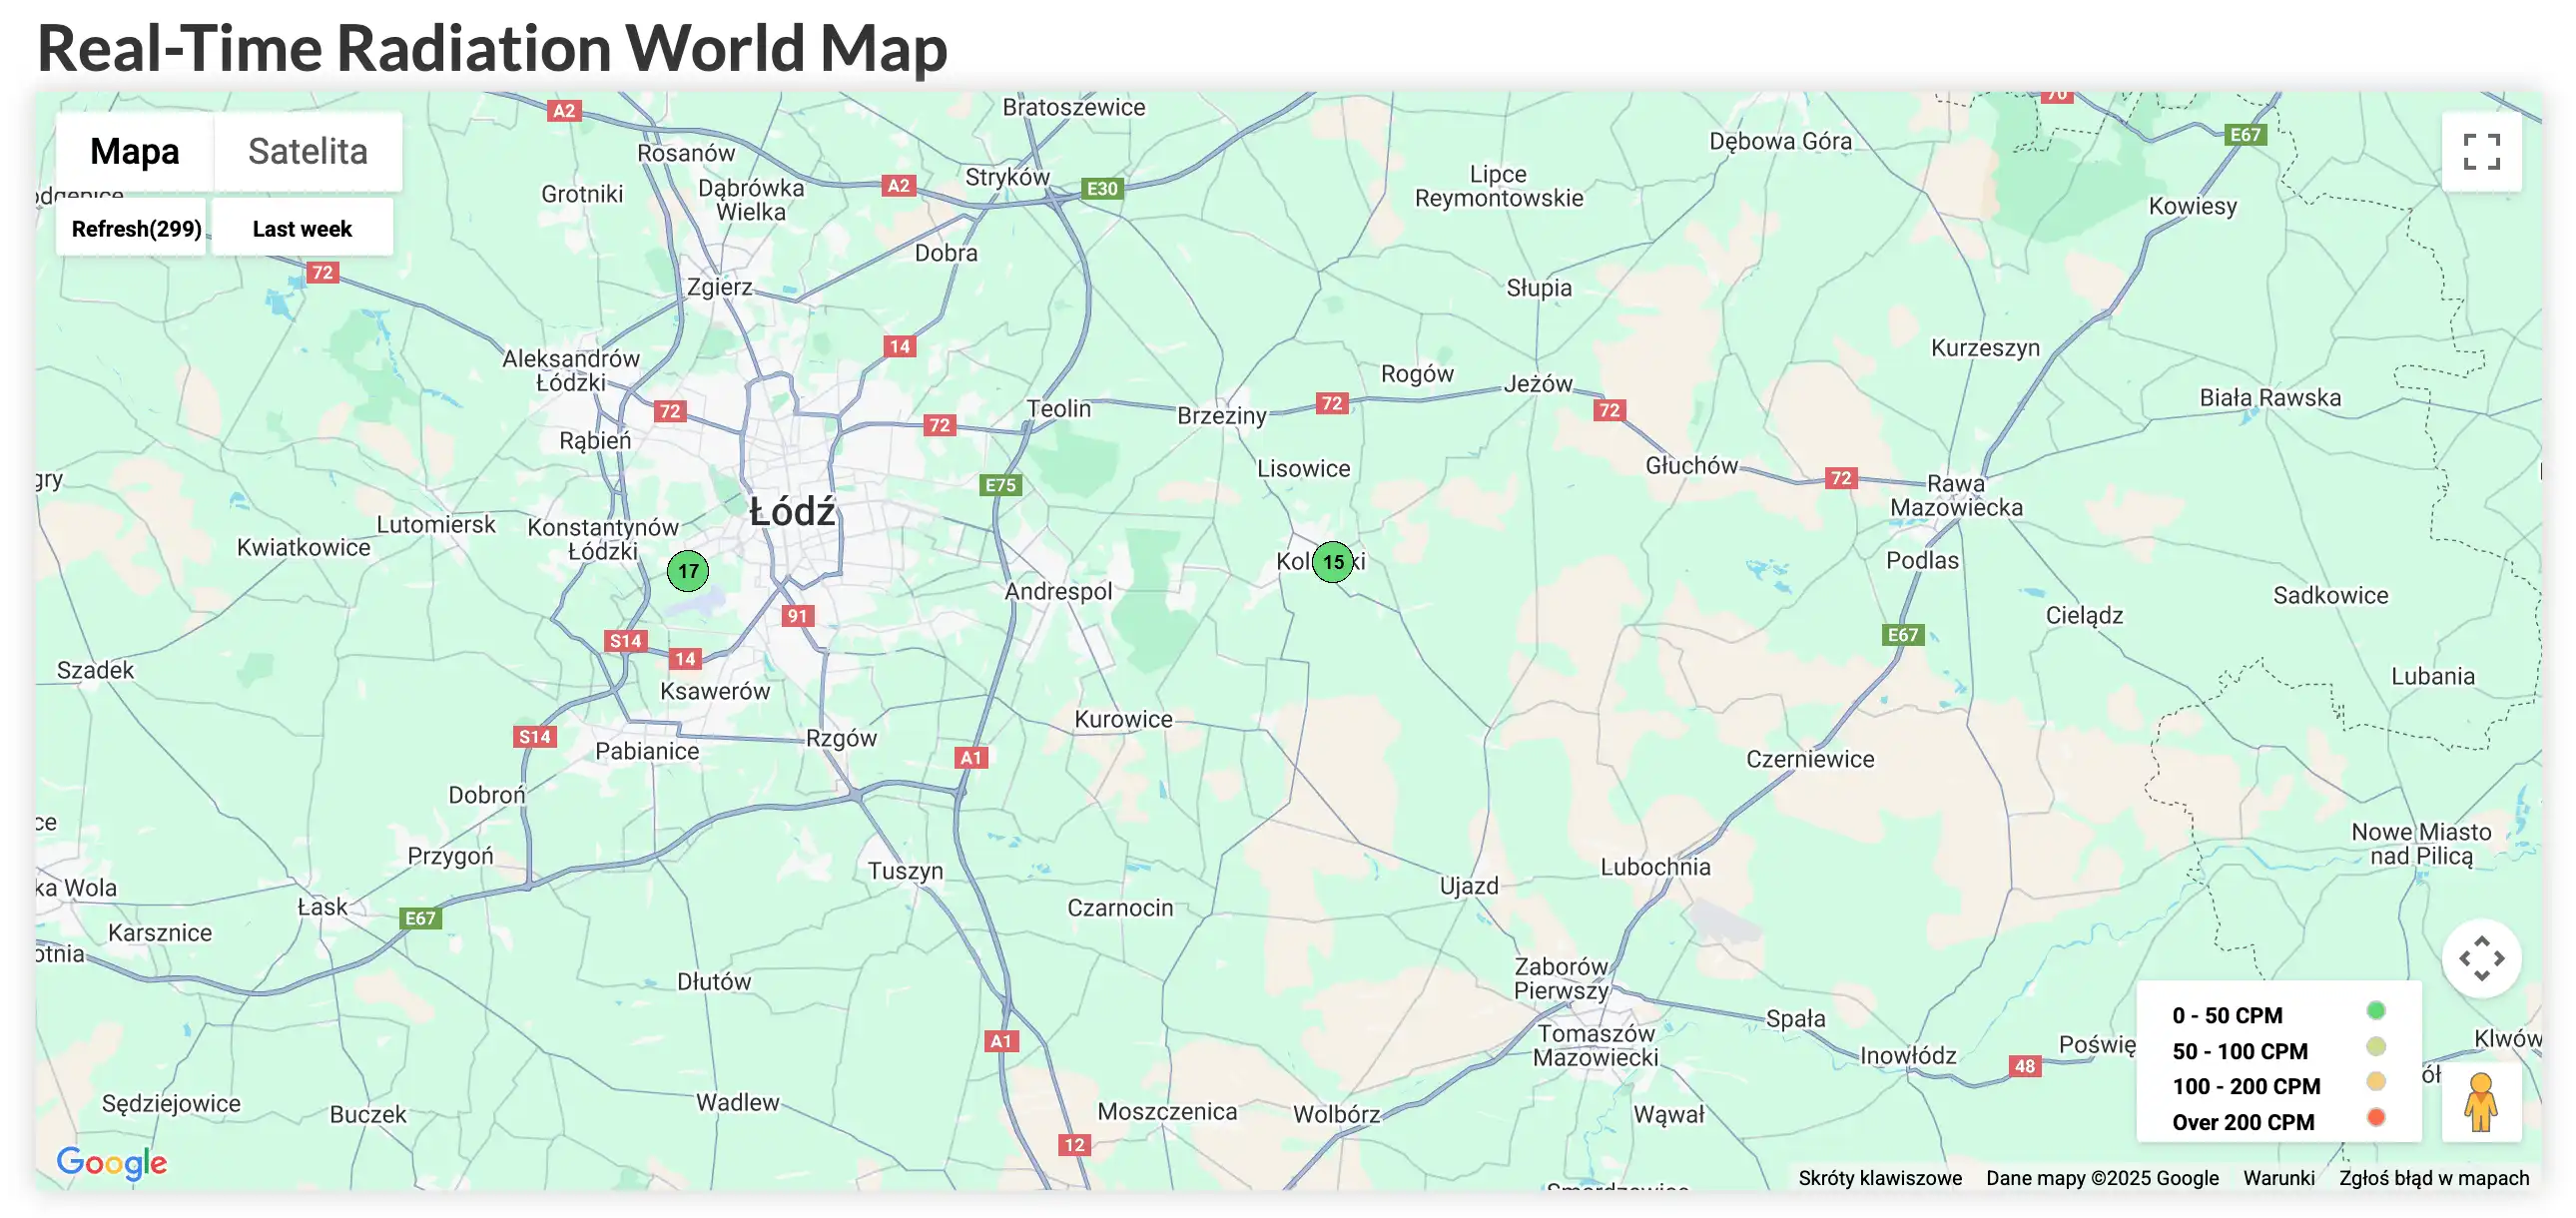
Checking Results on Monitoring Services
GMCMap.com Verification
After installation, I verified data transmission to GMCMap.com:
# Check recent submissions in logs
sudo journalctl -u radpro-monitor.service --since "1 hour ago" | grep -i gmcmap
The GMCMap interface shows your location pin with real-time readings and historical data.
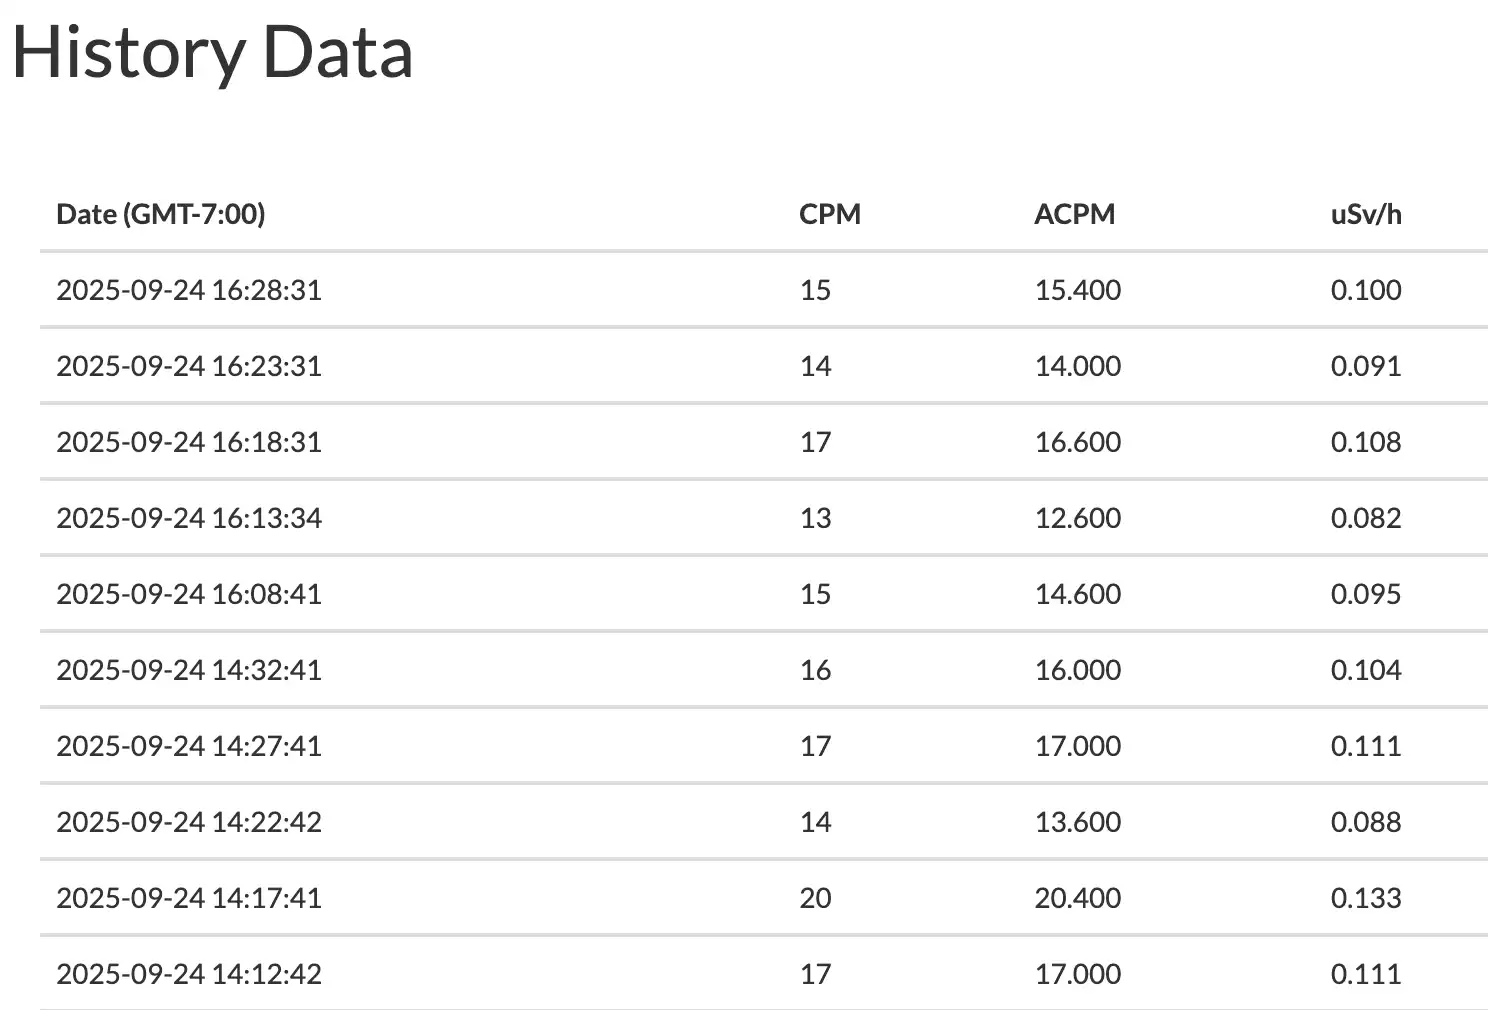
 gmcmap.com history data:
Conclusion
Transforming the desktop GC-01 radiation monitoring system into a permanent rooftop installation has been incredibly rewarding. The combination of PoE power delivery, weatherproof housing, and remote monitoring creates a robust environmental monitoring station that just works.
This project shows how affordable hobbyist hardware can create professional-grade environmental monitoring setups. The data collected contributes to global radiation monitoring networks while providing local environmental awareness.
Future Project Ideas:
- Solar power backup system
- Local data logging with a web dashboard in Grafana
- Additional environmental sensors (temperature, humidity, pressure)
This rooftop installation serves as a model for community-based environmental monitoring. It shows how individual contributions can build comprehensive regional monitoring networks.
The continuous operation and reliable data transmission validate this approach, encouraging similar installations by other environmental monitoring enthusiasts. Every station added to these networks enhances our collective understanding of environmental radiation patterns.